
Have you ever been frustrated by the drive letter changing when you attach an external drive? Do you have software that needs to be run from a particular drive letter?
If the answer is yes to either of these questions, you can easily change the assignment for a drive. But before starting, a word of warning - changing the drive letter for installed software could prevent software from running correctly.
In a few simple steps:

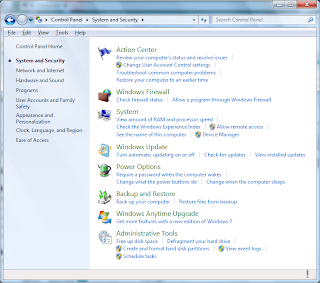
1. Choose Control Panel > System and Security > Administrative Tools > Create and format hard disk partitions, as shown in the first figure.
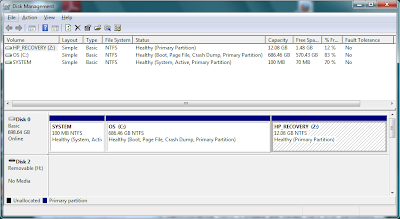
2. This will then display the Disk Management dialog as shown in the second figure. Click on the volume for the drive that is to be changed.
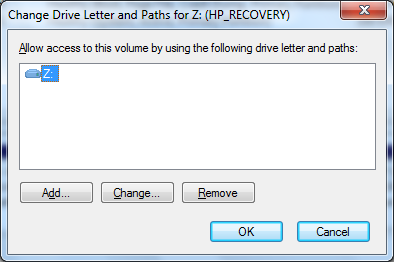
3. Right-click or select the menu option Action > All Tasks > Change Drive Letters and Paths...
4. Set the drive letter, as shown in the last figure.
No comments:
Post a Comment