A: The Adobe Acrobat print dialog "Page Handling" options allow multiple pages to be printed per sheet, and other printing options such as booklet printing. Pages are automatically scaled to fit on the printed page, which can be a different size to that of the original document. The Acrobat print options are very powerful and will probably do what you want!
First, open the print dialog (menu option "File" > "Print...").
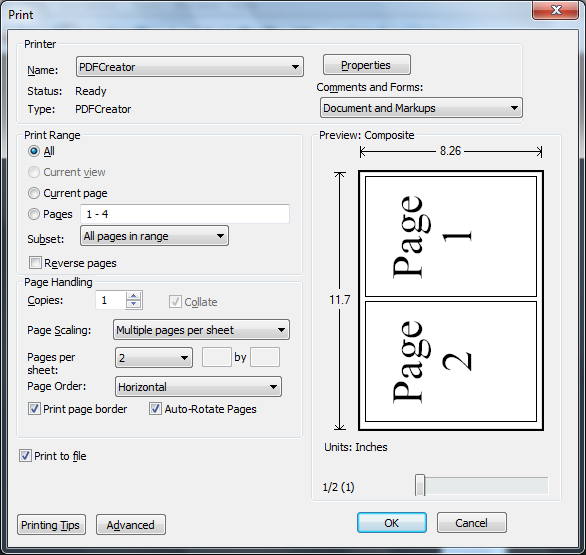
For the example below, "Page Scaling has been set at "Multiple Pages per sheet", "Pages per sheet" has been set at 2 and "Auto-Rotate Pages" has been checked. The auto-rotate pages option ensures that the pages are rotated for optimal use of the printed sheet.
In the second figure, "Pages per sheet" has been set at "Custom" and "2 by 2". The "Page Order" has been set at "Vertical". This gives four pages per sheet as shown.

The Adobe web site has some good tips on Acrobat printing. The Adobe web site also provides access to other support and user forums.
Postscript:
To change current printer settings for Acrobat choose the "File" > "Print..." menu option. This allows the printer to be changed and to make printer specific settings such as Paper Size and Orientation, for example A4 size with Portrait orientation.

Settings changed from within Acrobat will stay in place until Acrobat is closed. When next running Acrobat the default printer settings will be used.


